The main motivators for this project were my girlfriend’s up-coming birthday, my lack of funds to buy her an original present and a desire to try and put everything I’d learned so far during my previous toy making attempts into practice.
Due to the more detailed explanations of each stage in my previous attempts this explanation will be more succinct and only really go into detail where I have made changes to my process.
Part 1 – Designing and making the model
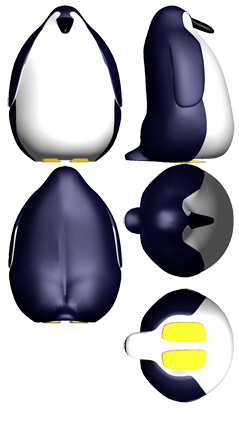
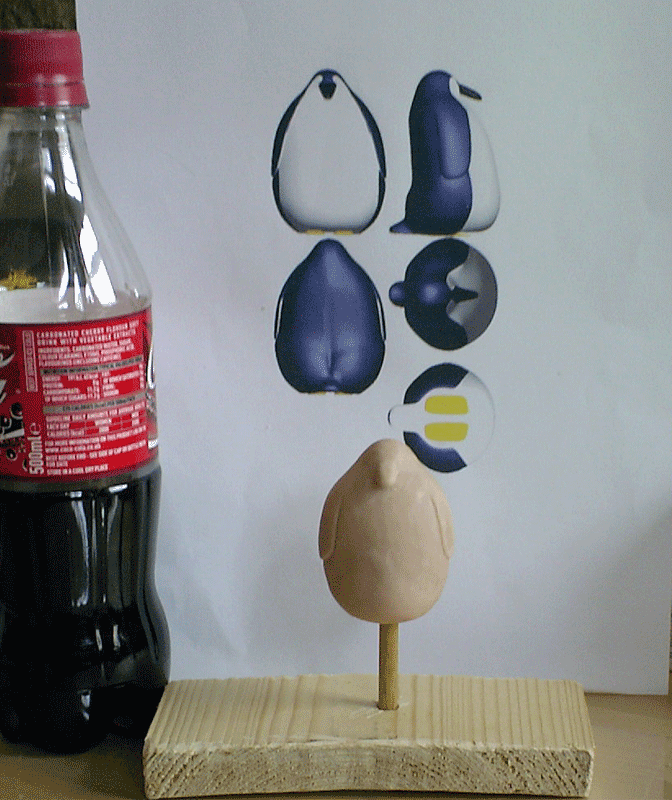
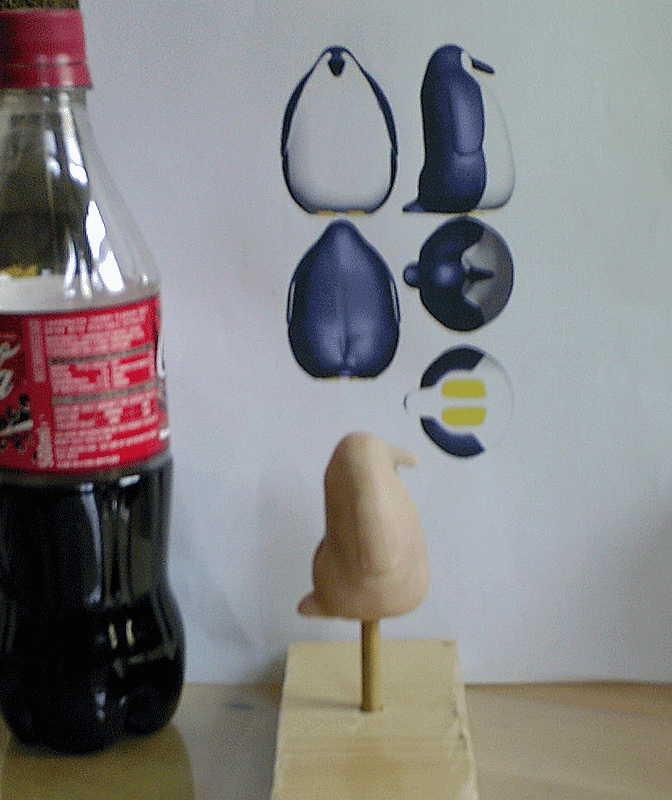
She’s always had a soft spot for penguins, and what with the fact it’s a winter birthday and ‘Happy Feet’ has just come out at the cinema (I also discovered after starting this project that it appears to be penguin week on one channel the week of her birthday) that seemed like an appropriate basis for a toy. I took my (rejected, but still preferred by me) first design for a penguin in the mobile game ‘Ice Blade Penguin 2’ (you can see the eventually accepted penguin design based much more closely on the character from the previous game on my stills page), and after just a few alterations had a model reference sheet. I kept the design simple to help with the fact I had little time left to make the toy, the projected size of the finished model (only about 55mm tall when complete) and to simplify the mold-making and removal.
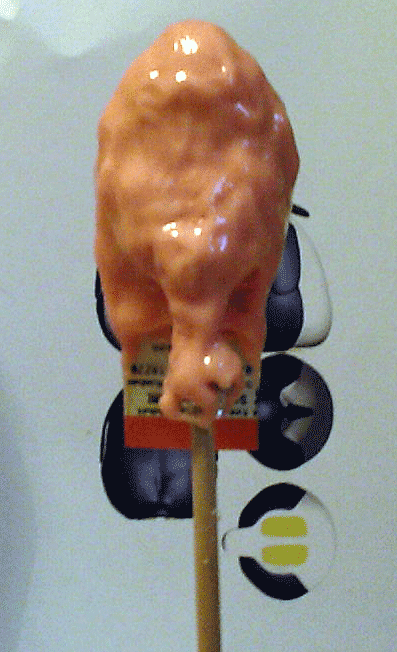
I learned in my first toy making attempt that a properly set-up armature is a big help, both in holding the work in progress secure, and in bulking out so that less clay is used, which is more economically sound as well as reducing baking time and chance of burning the model. I built a simple solid armature to scale, bulked it out with aluminium foil. I then proceeded to cover this in polymer clay and baked for 15 minutes. I then added feet to the model, re baked and finished off by filing and sanding till very smooth. (I only have pictures of up until the first pre-baked stage due to time constraints and forgetfulness).
Part 2 – Mold making and casting
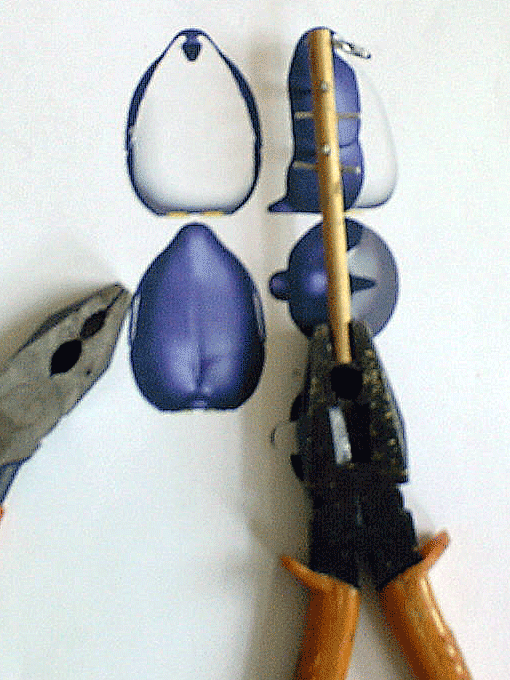
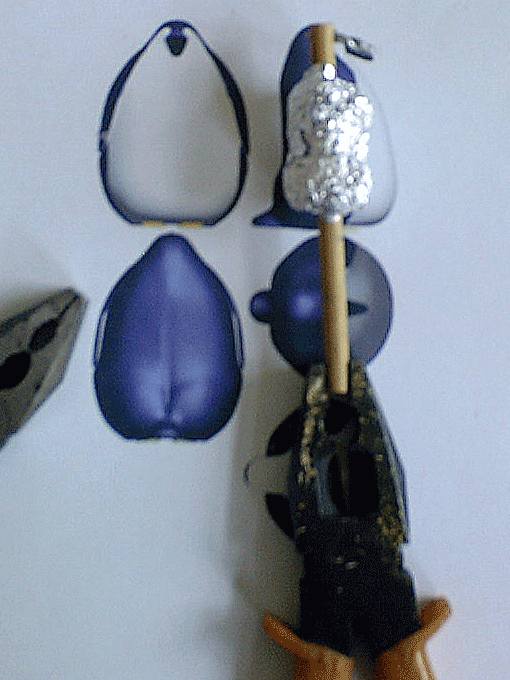
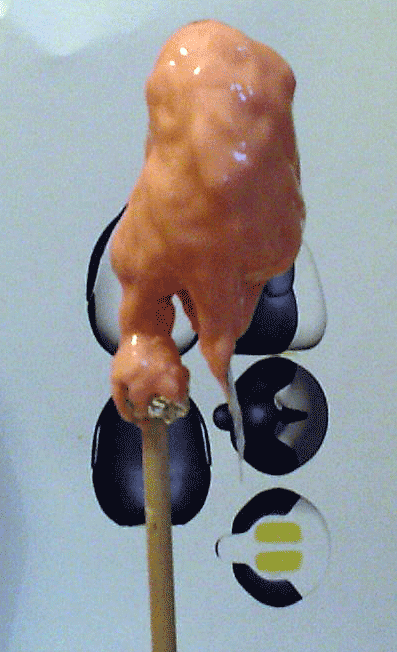
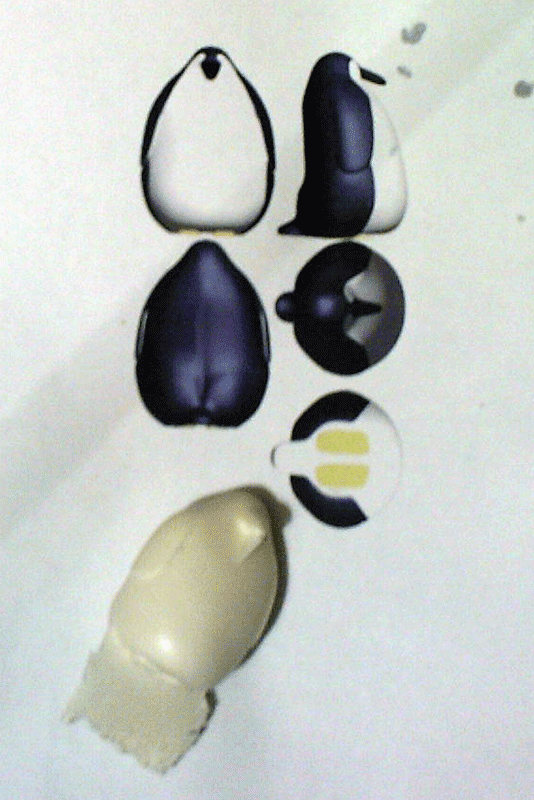
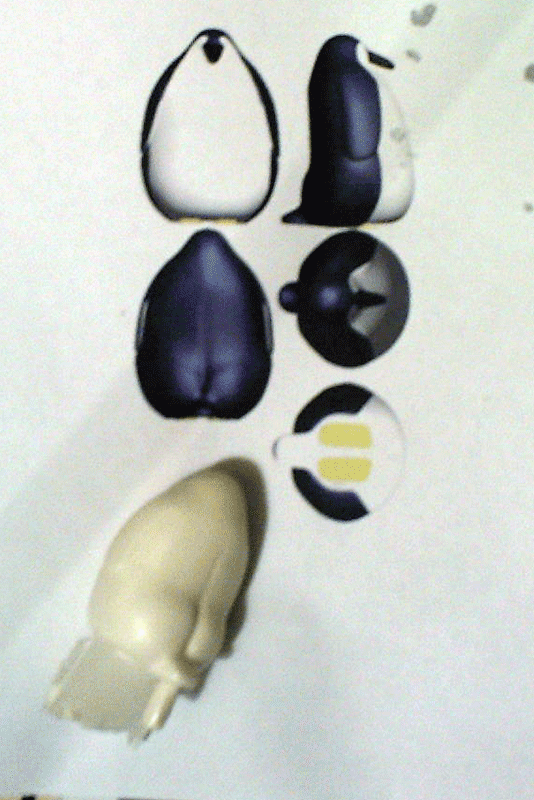
I decided on a 1 piece mold as it’s a nice small simple model which theoretically should come off the model and castings relatively easily. For preparation I attached a piece of card to the base of the penguin to widen the ‘removal hole’ at the end whilst still retaining the shape and attached a new ‘pouring sprue’ to the tail and a small piece of plastic between the beak and stomach to help aid removal. I made the mold as before, but only needed 3 layers of silicone this time. Removal was successful on curing of the mold without breaking anything, although the mold did tear a little along the removal hole, creating a need to seal a small section with wax as with my previous molds, but this hardly interfered with my successful 3 casts which only needed a small amount of clean-up. If I decide to make another mold in the future (if I want to make more than the 3 successful casts I have as the tear does lengthen slightly with each removal) the only alteration I would make would be to attach 2 sections of card to the base of the model in a cross shape, as this should make removal even easier.

Part 3 – Clean-up, painting and finishing
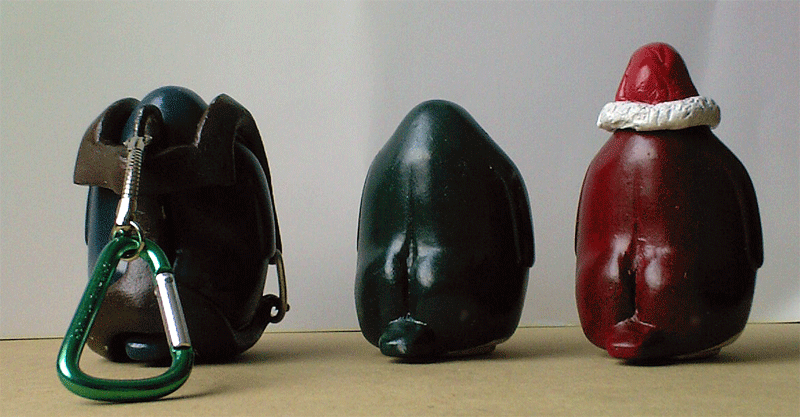
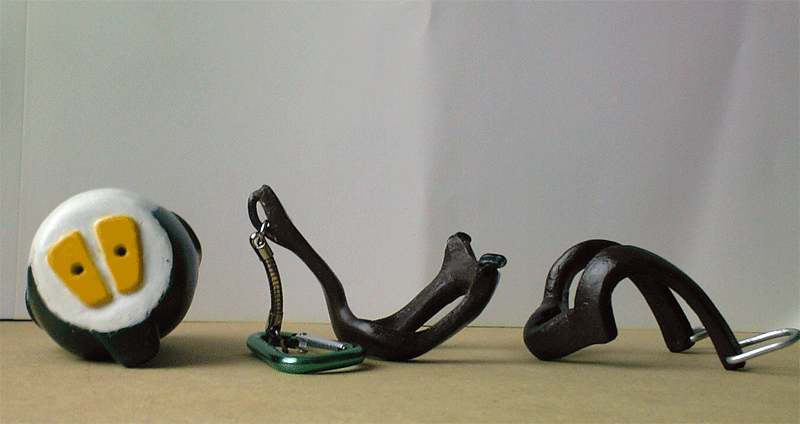
I cleaned up my casts in preparation for priming, but decided I wanted a way to convert them into keyring’s as well as display toys in the same way that ‘Qee’s’ have a removable keychain. I didn’t want to start dissecting my models now to include removable parts, as adding another design element at this stage was complex enough with my limited time frame and no budget for extra materials. I quickly designed a removable 2 part ‘harness’ for the penguins and laid some sculpey ‘straps’ on the original sculpey model, to bake sections of them for strength during construction. The result (I forgot again in my haste to take any pictures of these stages) was relatively successful, with a slightly bespoke and fragile sculpey harness, which I placed the parts of onto one of the casts in turns, using the cast as the first part of a two part mold, the second part being made of silicone as before, and cast the individual harness pieces, with the required metal sections inserted into the mold and cast in place. These needed more extensive clean-up than the penguins, to allow for fitting when the penguins and they were painted and because of the slight rush whilst making them (they were only made and cast a couple of days before the birthday). I primed the penguins and then painted everything with acrylic paints, adding images to all of the penguins stomachs by printing out on some ‘waterslide decal paper’ and applying them before lacquering the whole lot with a clear spray lacquer bought from Halfords. The santa hat on the last penguin was a last minute addition made in sculpey and attached to the model with a small pin so it’s removable.
I count this project as another success, the only unsatisfactory part for me being the painted finish but this is more due to my poor painting skills and the hurry in which the models were finished. Given more time I would have found some spray paints in the correct colours, created re-usable masks for each painted section possibly in resin or silicone, and cast the harness perhaps as one piece in a stretchy rubber so it would be a more secure fit on the model and would not cause wear on the paint with constant removal and application as the one I have made does. The photos on the final penguins stomachs have been blurred in the following images to protect the innocent.